KPovModeler 0.2
Written by Olivier Saraja (olivier_at_linuxgraphic.org)
English version
Basic Tutorial: Creating your first scene
OK, that's it. You have just installed povray and kpovmodeler, and now you already want to start without much knowledge of any of the two softwares. Here we go now: if you follow the steps of this tutorial, you'll be able to set the ultimate simple scene, very widespread among the newbies: a sphere over a plane.
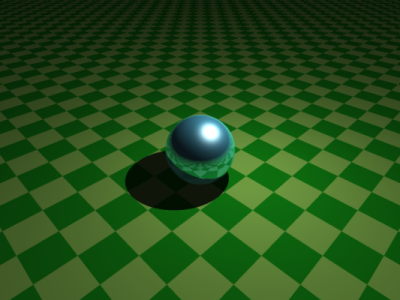
At any time you can render your scene using one of the following methods:
Using the menu: Display > Render
Using the toolbar: click on the  icon
icon
but you should carefully consider the following warnings before complaining if all you get is a black screen. If this is the very first time you use a 3D software, you should be aware of these golden rules:
(1) If you set no camera, no rules apply to the render engine which can't render a proper picture, ending in a black picture.
(2) If you set no light system, all your scene is in the dark, ending in a black picture.
(3) The objects for which no material has been set won't show on the rendered picture, ever.
Step 1: Start kpovmodeler
If you got everything installed fine, once kpovmodeler is loaded, you discover the following default windows setting.
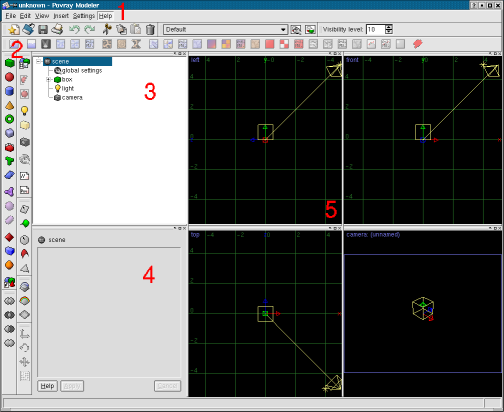
Take a few minutes to explore the menus and icons available. If you have time, please read the documentation in order to get a fair idea of what you can expect from this piece of software.
Apart from the menus (1) and the various toolbars (2), the program has 3 different views
(3) The Object Tree
(4) The Object Properties View
(5) The Graphical View
You will have to use each of them intensively from now on, so always keep them and their use in mind.
Step 2: Setting the camera
First of all, we will set a camera. In order to do so, two convenient ways are available:
Using the menu: Insert > Camera
Using the toolbar: click on theicon
The Graphical View shows how the camera is set regarding the whole scene we are creating. In particular, we can now see something in the fourth Graphical View (Right, Bottom): this is the view of the scene from the camera point of view. This is what will be seen when you render the scene.
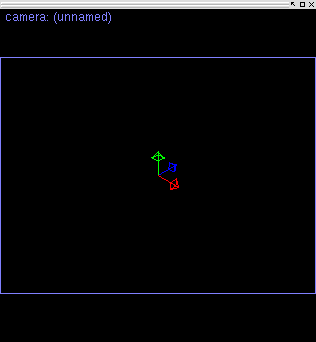
The Object Tree now shows a new entry, reading 'camera'. If you click on it, it affects the content of the Object Properties View, where various parameters pertaining to the camera can be found. Refering to the Povray's documentation to learn more about these could be helpful.
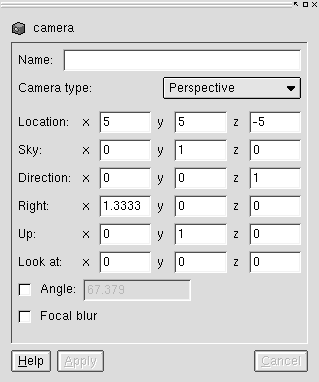
We will change nothing to the basic settings of the camera, this will be the scope of later tutorials, but please note that in the Graphic View, the camera has control points that let you control the point to which the camera points. You just have to left-click on one handle and move it to an appropriate location.
Step 3: Setting a light
The same way we have set a camera, we will now set a light system:
Using the menu: Insert > Light
Using the toolbar: click on theicon
A new entry features now in the Object Tree. If you click on the Light entry, you see that the Dialog View changes in order to show the parameters available to the lighting system. We will change some parameters in order to set the light higher above the horizon (y=3), slightly on the right (x=1) and in the foreground (z=1). We can also rename the light system (Name=Main Light). Change the values in the Object Properties View as follows:
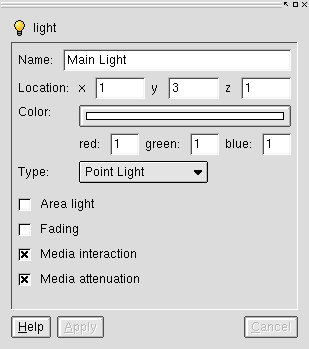
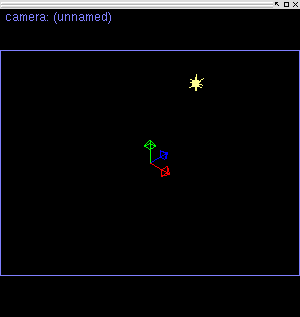
Once you press the Apply button (or hit Enter), the Graphic View and the Object Tree immediately change in order to comply to these settings, and here is what now should see the camera.
Step 4: Creating the ground
There are many ways to create a ground for our scene. One method could have been to insert a box object ( Insert > Finite Solid Primitives > Box) and resize x to 100, y to 0 and z to 100, for example, but it's a cumbersome way to do this task.
In fact, kpovmodeler offers you a convenient feature: you can create a infinite plane that will feature the ground:
Using the menu: Insert > Infinite Solid Primitives > Plane
Using the toolbar: click on theicon
Take a good custom: having the plane selected in the Object Tree, please change its name in something that is convenient to you and then press the Apply button (or hit Enter). The Object Tree will update the name of the entry.

The Graphic View also shows the plane now, even if it looks finite by now. But don't worry, it will spread up to the horizon line when you'll render the scene!
If you pay attention to the Object Tree, you will notice that the Ground entry can be expanded if you click on the 'plus' icon standing just before the object. Once done, you see various settings parented to the object. In this case, there isn't much yet, apart from the standard options to any newly created object: scale, rotate, and translate. Selecting each of these will change the settings available in the Object Properties View.

In this scene, we will arbitrary translate the Ground one unit lower than the horizon line, just for you to tweak some of these parameters. Select translate, and adjust the parameters as follow:

Your scene should now look like the following picture.

Step 5: Setting a Material for the Ground
Please select the Ground prior to adding any material properties to it. Many possibilities await us, but we will stay close to something quite easy for now.
Using the menu: Insert > Textures > Pigment
Using the toolbar: click on theicon

In both cases, a popup window will prompt you to choose the way the object should be inserted. Please choose First Child. The Pigment now appears in the Object Tree. You can change its name in the Object Properties View (Name=Ground Pigment), and click on the Preview button in order to see how the pigment looks like for now.
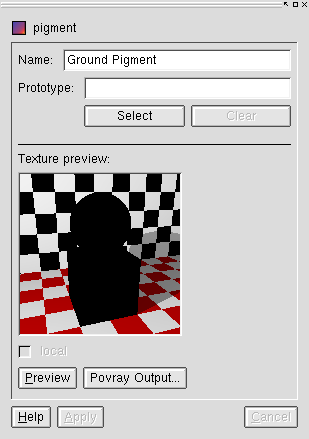
Of course, the Preview of the pigment shows nothing but a black matte material, because we need to refine the pigment settings. Anyway, keep in mind you always can preview the look and feel of your materials using the Preview button. We will now define the pigment colors. Again, many possibilities await us, but we will choose one of the most straightforward for now.
Using the menu: Insert > Textures > Color List
Using the toolbar: click on theicon
If no color shows on the box and the sphere of the Preview, click on the Apply button before calling for a Preview.

The ground material has been succesfully set! If you render your picture
now, using the  render icon, you should get the following result:

Of course, these colors are not the ones you could have expected. We still have to see how we can customize them. In the case of the color list, you have to define two new sets of attributes, called Solid Color. In the Object Tree, make sure the Color List entry is selected. Then go through this two times (you can't do it more, anyway, as the Ckeckers Color List can only afford the use of two Solid Colors):
Using the menu: Insert > Textures > Solid Color
Using the toolbar: click on theicon
One after another, in the Object Tree, select the two Solid Colors and change their color attributes in the Object Properties View:

...these attributes are for the #1 solid color (press Apply!),

... and these attributes are for the #2 (press Apply again!).
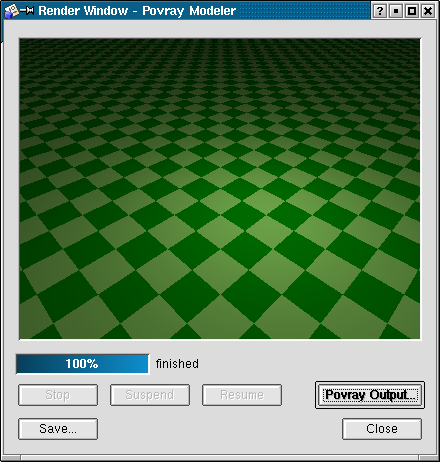
Of course, a new rendering of our scene will prove that everything has been taken into account accordingly:
Step 6: Creating the Sphere
For this step, we should already be at ease, because we begin to understand kpovmodeler's general behavior. In the Object Tree, select the Scene entry. Creating the Sphere is as easy as creating the Ground:
Using the menu: Insert > Finite Solid Primitives > Sphere
Using the toolbar: click on theicon

As before, select First Child when asked for.
The Object Properties View offers you immediately to change its settings, which we'll do right now. By setting the Radius value to 1 (don't forget to hit Enter or press Apply), we make sure that the Sphere will be in contact with the ground. Otherwise, since we moved the ground one unit bottom, the sphere will look like floating above the ground.
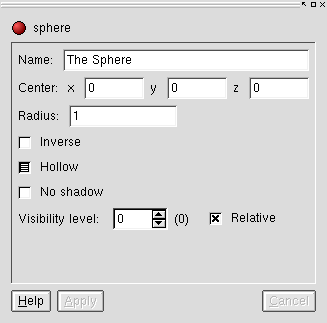
Of course, a rendering now will give a strange result: as already seen before, the Sphere appears with a black matte material. We will set a proper material in the following step.

Step 7: Setting a Material for the Sphere
With the Sphere selected, you can now set a material for it. As we already did for the ground, let's give to the Sphere a pigment color:
Using the menu: Insert > Textures > Pigment
Using the toolbar: click on theicon

select First Child and rename to Sphere pigment, for example. With the Sphere pigment entry selected, insert a Solid Color and set the parameters as follow:
Using the menu: Insert > Textures > Solid Color
Using the toolbar: click on theicon

You already can render the scene and get a first poor result:

But there are more interesting effects to achieve if we take time to set some Finish attributes:
Using the menu: Insert > Textures > Finish
Using the toolbar: click on theicon
then change the values according to the following snapshot and then press Apply or hit Enter.

The Specular and Reflection parameters give particularly good visual effects, perfect for glass or chrome-like effects, even if Metallic hasn't been chosen at this step:

Conclusion
There are still so many things to discuss! In particular, the chapters about Materials and Lighting ought to be explored more in depth. But anyway, you should already have a fair glimpse of what is possible with kpovmodeler. Hopefully, you are already skilled enough to do simple but beautiful things, and be sure that more is to come... ;o)
Click on the picture to download the source kpm file of this tutorial